This tutorial is better for iOS developer to master build basic macOS app skills. Meanwhile, this app is also a useful tool for an iOS developer.
We know how package with Xcode. We use archive so that we can export .ipa file. Before submit to AppStore, we often offer .ipa file to tester to do test. When you do several projects at same time, you are easily to make mistake or a bit of trouble to do this work. And PackageMachine is a macos app that can help you manage your projects and export .ipa file with one click.
Here’s a tutorial for how to build such a macos app.
Build the app
Create project
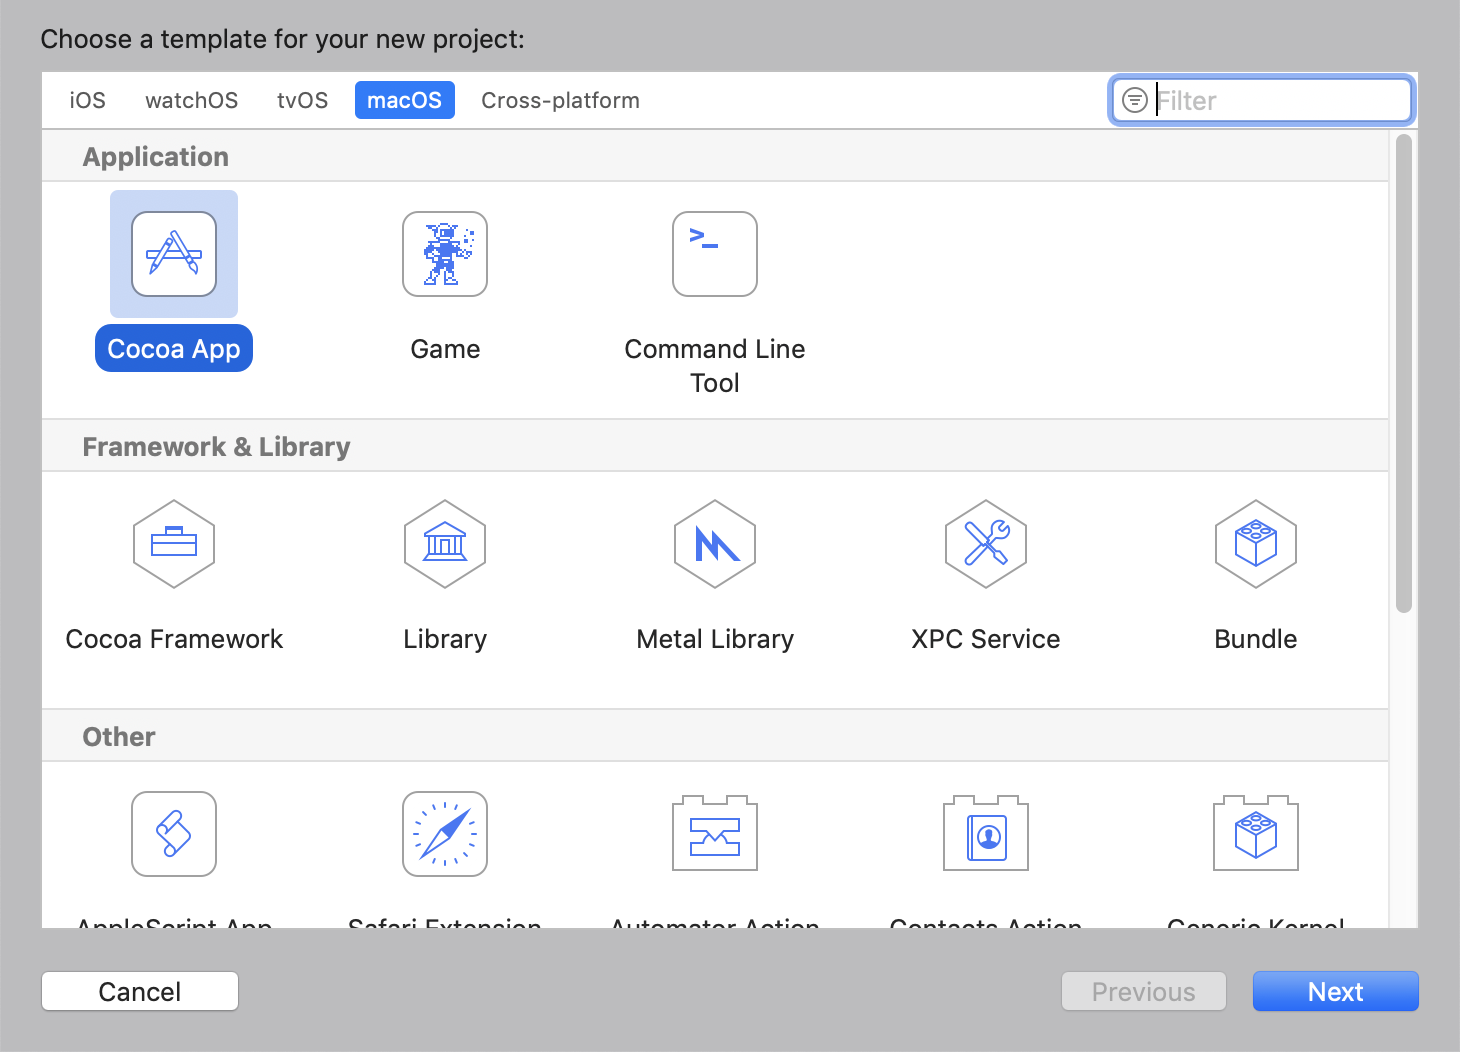
First you need to open Xcode then to do File-New-Project.
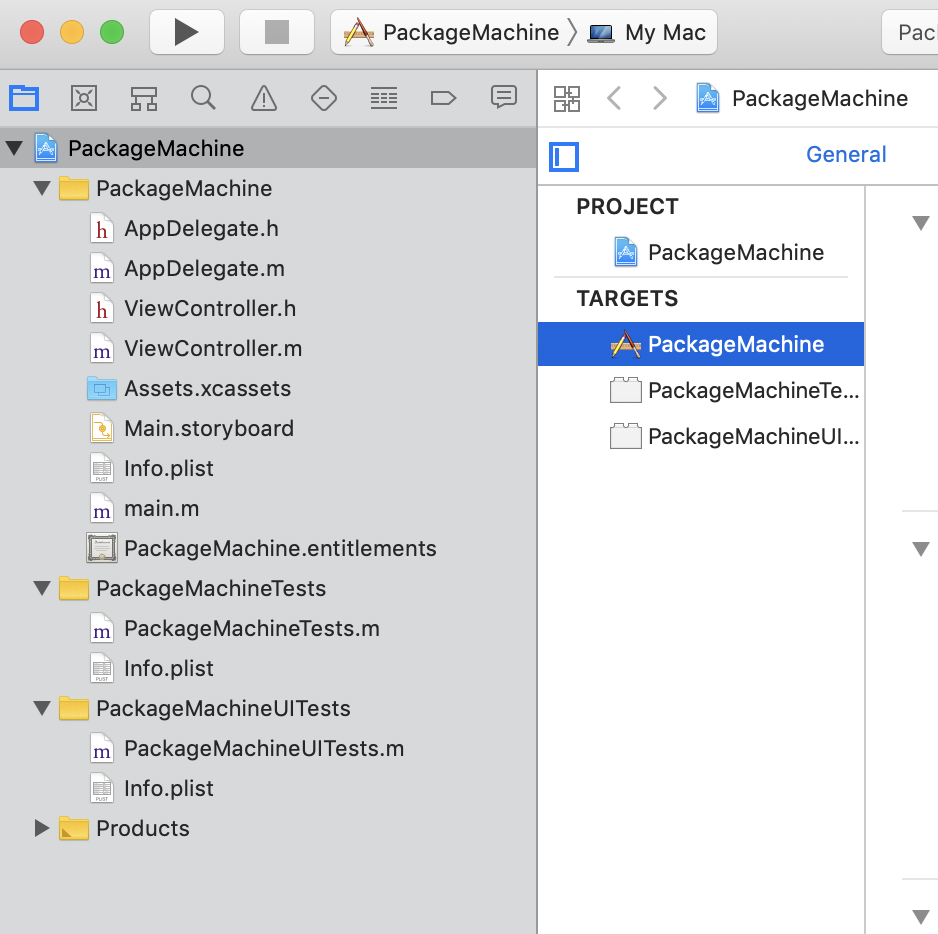
then choose macOS-CocoaApp and tap next to create a CocoaApp template. We give it a name “PackageMachine”. So now we have:
Draw views in Main.storyboard
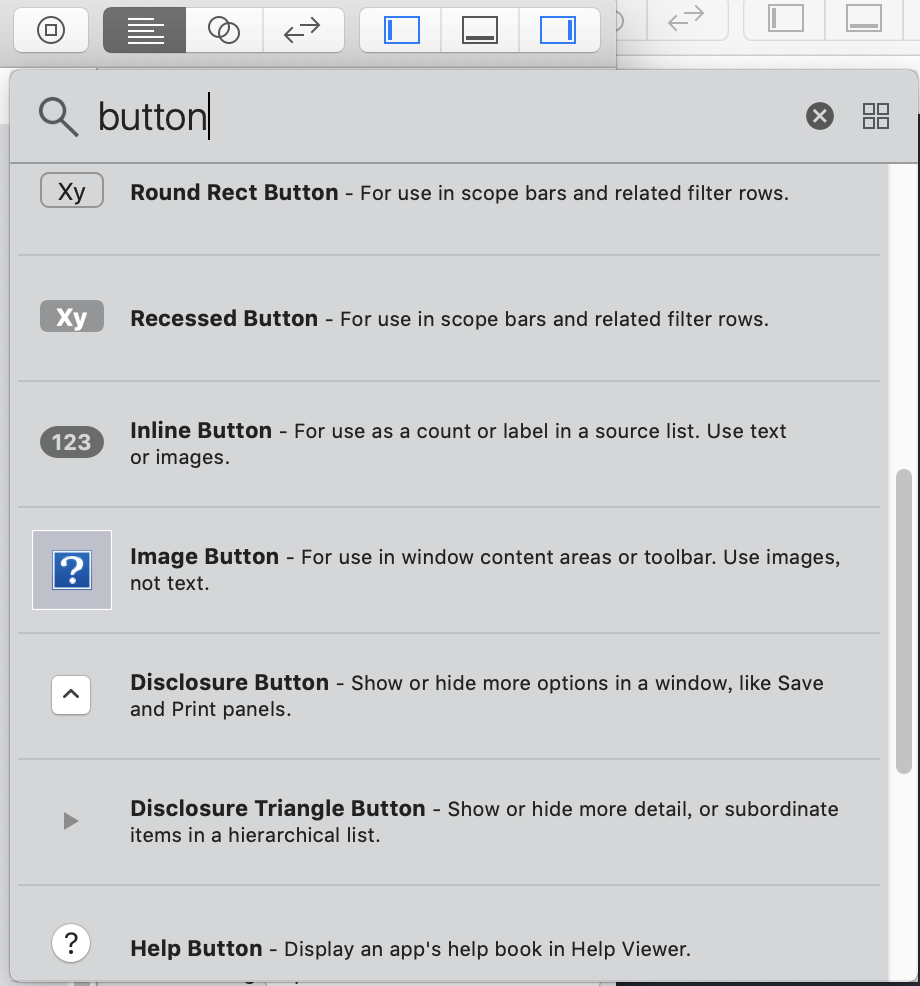
Use Main.storyboard can help us see the project structure clearly and to do less code. You can use library and search to find plugs you want quickly.
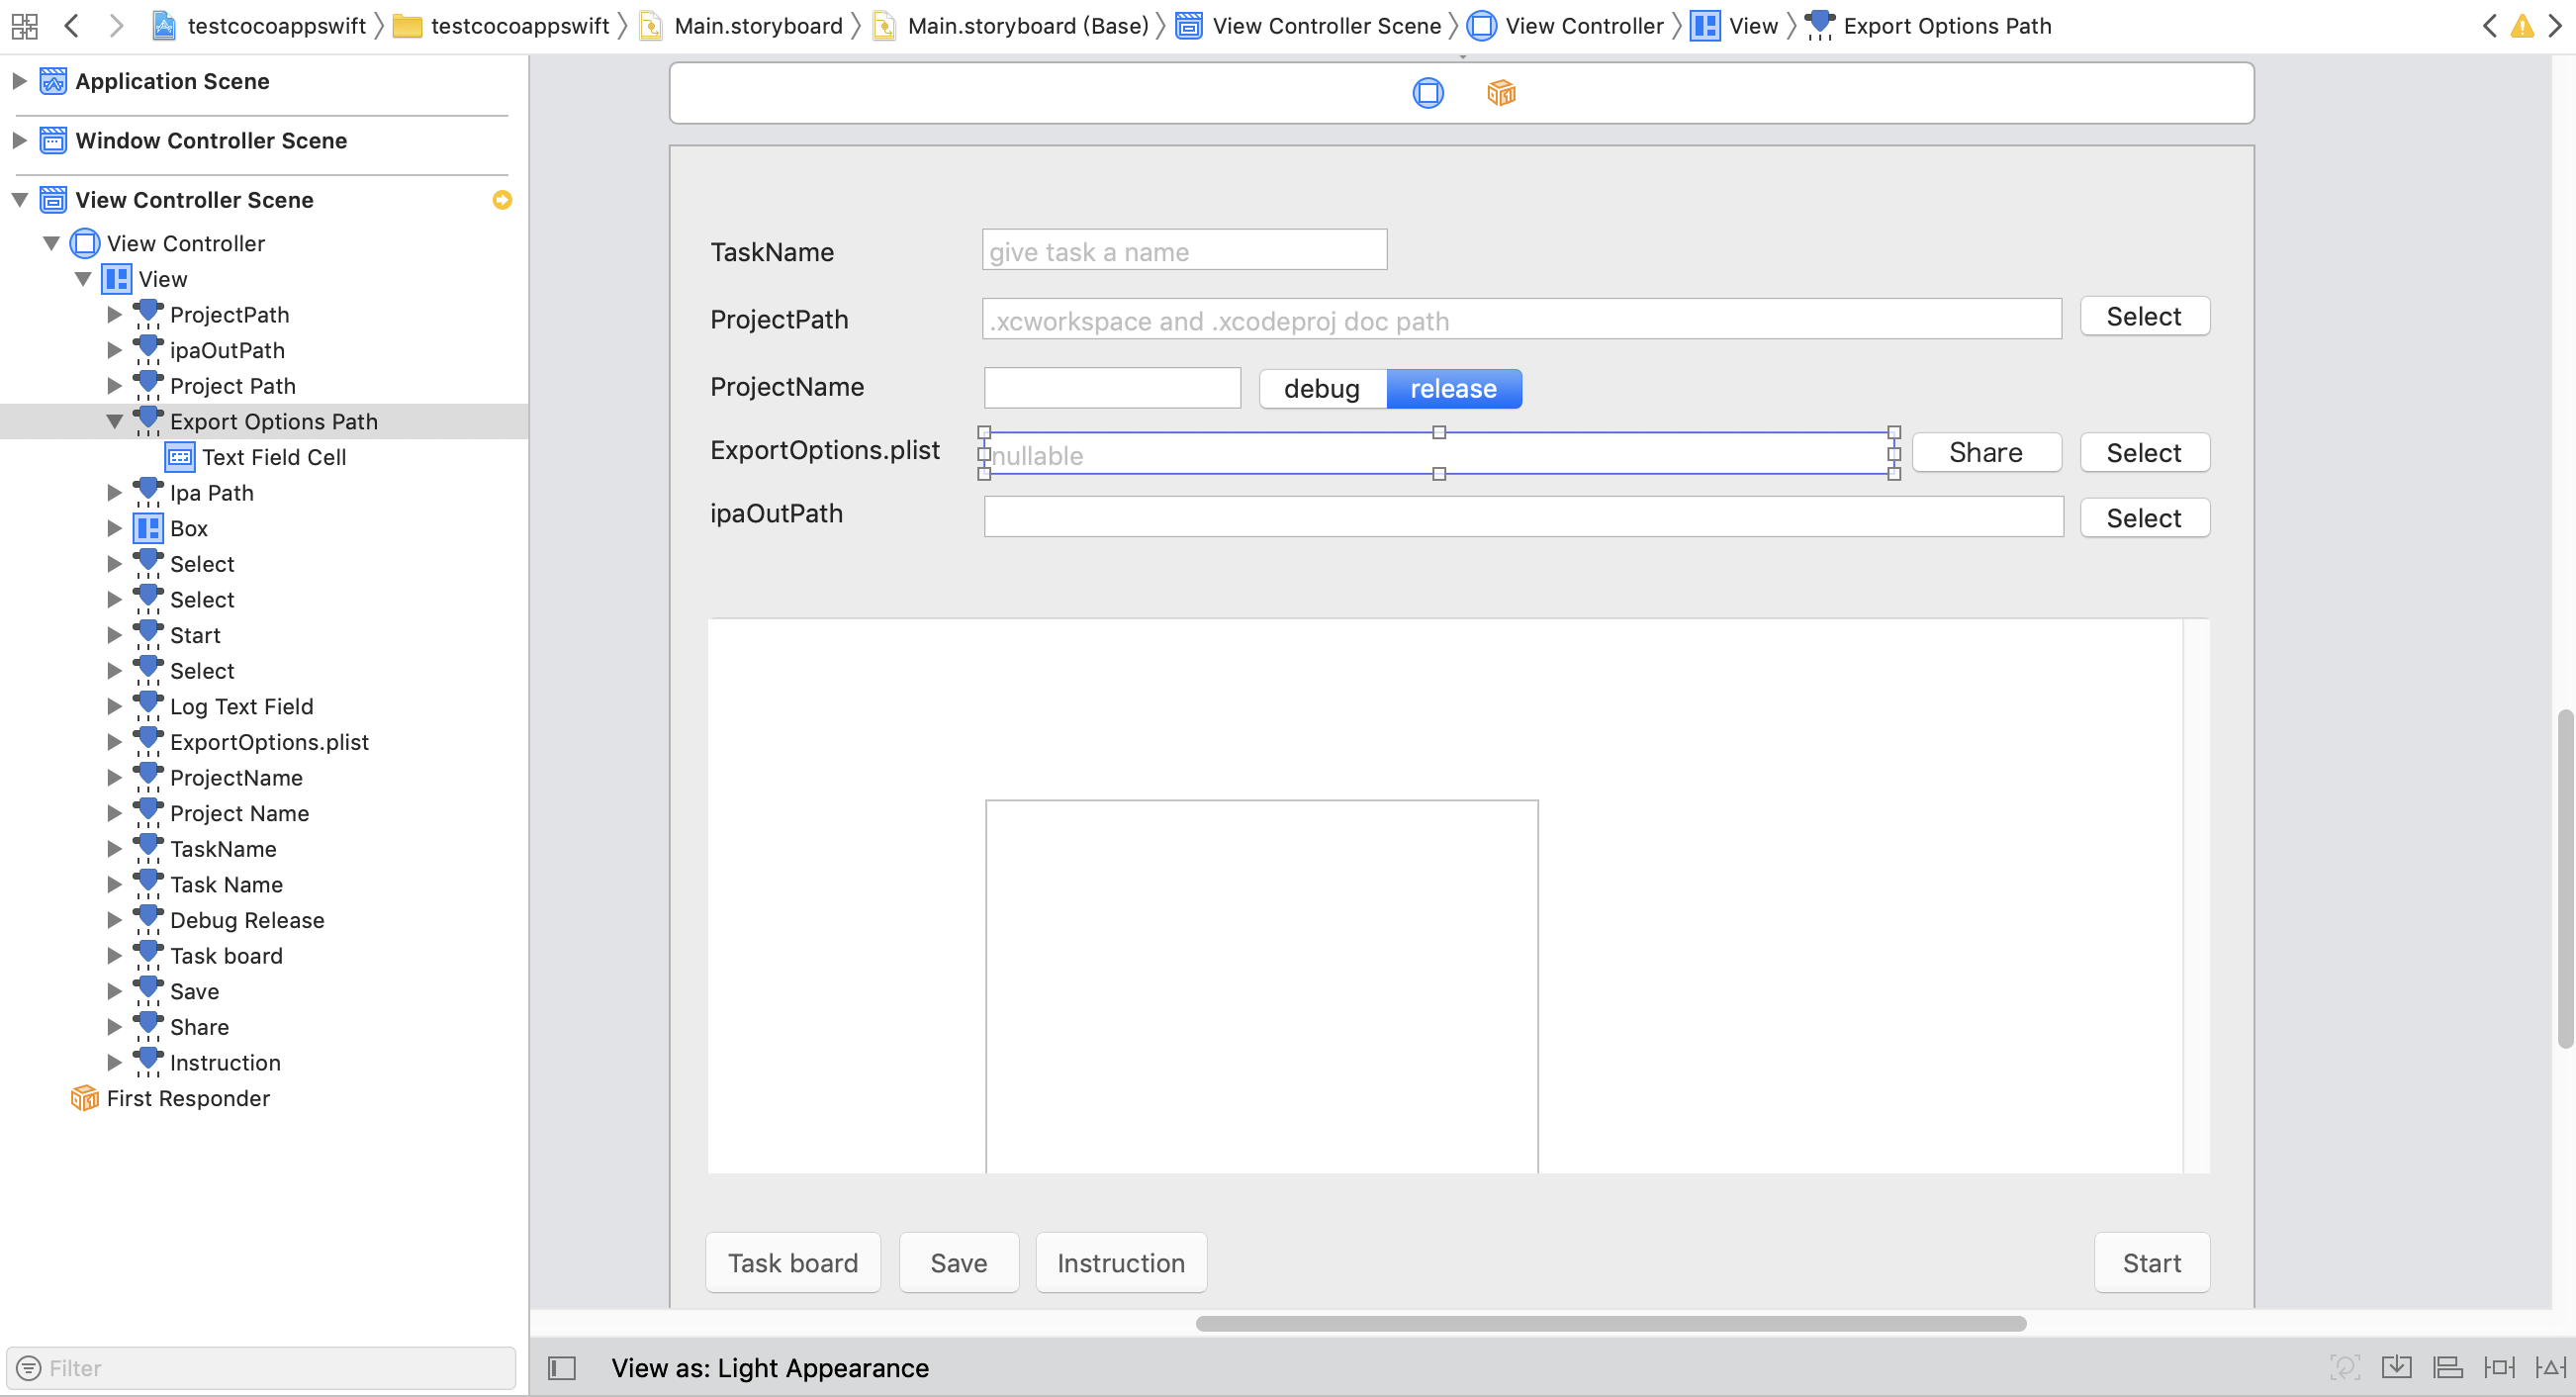
Then layout the view carefully.
It’s not hard to layout the display like this.
State IBOutlet
In swift it do not like ObjectiveC has .h file, we just declare IBOutlet in .swift. We find ViewController.swift and do following statement. So that we can connect code to our storyboard layout later.
1
2
3
4
5
6
7
8
@IBOutlet var taskName: NSTextField!
@IBOutlet var projectPath: NSTextField!
@IBOutlet var projectName: NSTextField!
@IBOutlet var debugRelease: NSSegmentedControl!
@IBOutlet var exportOptionsPath: NSTextField!
@IBOutlet var ipaPath: NSTextField!
@IBOutlet var logTextField: NSTextField!
@IBOutlet var showInfoTextView: NSTextView!
Remember to open assistant editor in the middle and show the inspectors in Xcode.
Connect all the target one to one carefully. Once you have done, you can change display in storyboard with your code now.
Don’t forget to link button and segment control at same time. For button, I use tag to distinguish the different path selected.
1
2
3
4
@IBAction func selectPath(_ sender: NSButton) {
        let tag=sender.tag
        print(tag)
}
Interaction method
We want to get project path with one click and show the document list. So we need to use NSOpenPanel() It has been realized by Apple, once you import Cocoa you can use all the base classes. The selectPath(_ sender: NSButton) method can be realized as:
@IBAction func selectPath(_ sender: NSButton) {
        let tag=sender.tag
        print(tag)

        // 1. create Panel object
        let openPanel = NSOpenPanel()
        // 2. set button text
        openPanel.prompt = "Select"
        // 3. forbidden select file, we only need path.
        openPanel.canChooseFiles = true
        if tag==0||tag==2 {
            openPanel.canChooseFiles = false
        }
        // 4. set can choose directories
        openPanel.canChooseDirectories = true
        if tag==1 {
            openPanel.canChooseDirectories = false
            openPanel.allowedFileTypes=["plist"]
        }
        // 5. pop sheet method
        openPanel.beginSheetModal(for: self.view.window!) { (result) in
            // 6. when ok button clicked
            if result == NSApplication.ModalResponse.OK {
                // 7. get the current path
                let path=openPanel.urls[0].absoluteString.removingPercentEncoding!
                if tag==0 {
                    self.projectPath.stringValue=path
                    let array=path.components(separatedBy:"/")
                    if array.count>1{
                        let name=array[array.count-2]
                        print(array)
                        print(name as Any)
                        self.projectName.stringValue=name
                    }
                }else if tag==1 {
                    self.exportOptionsPath.stringValue=path
                }else{
                    self.ipaPath.stringValue=path
                }
            }
        }
    }
This method help us record all the paths and we will talk how to save all the data later. And we use path.compoents(separatedBy:”/“) to separate string to array.
When segment control state changed, we can add a select to monitor the state.
Can we run task now? The answer is no. We need something else to do.
We should replace some var in shell script with the path we set before by using replacingOccurrences method. The code can be see as:
1 2 3 4 5 6 7 8 9 10 11 12 13
let returnData = Bundle.main.path(forResource: "package", ofType: "sh") let data = NSData.init(contentsOfFile: returnData!) var str = NSString(data:data! as Data, encoding: String.Encoding.utf8.rawValue)! as String if debugRelease.selectedSegment==0 { str = str.replacingOccurrences(of: "DEBUG_RELEASE", with: "debug") }else{ str = str.replacingOccurrences(of: "DEBUG_RELEASE", with: "release") } str = str.replacingOccurrences(of: "NAME_PROJECT", with: nameStr) str = str.replacingOccurrences(of: "PATH_PROJECT", with: projectStr) str = str.replacingOccurrences(of: "PATH_PLIST", with: plistStr) str = str.replacingOccurrences(of: "PATH_IPA", with: ipaStr) str = str.replacingOccurrences(of: "file://", with: "")
And last step before running we need go to global thread to make sure the app will not get stuck when running our task.
Our code will default run in main thread, which is UI thread. Normally we should put time cost task in child thread so that the UI thread will not get stuck.
// set task task.launchPath = "/bin/bash" // absolute execution path
// set command task.arguments = ["-c",str] task.terminationHandler = { proce in // finish block self.isLoadingRepo = false // recover sign //5. back to UI thread DispatchQueue.main.async(execute: { self.logTextField.stringValue="finish running task..."; }) } self.captureStandardOutputAndRouteToTextView(task) task.launch() // run task task.waitUntilExit() // wait to finish }
Then we create a Process() to run the shell script, and go back to main thread in terminationHandler block. If user not set a path, we use default file to execute:
1 2 3 4 5
var plistStr:String=self.exportOptionsPath.stringValue if plistStr.count<=0 { let homeDic=NSHomeDirectory().appending("/ProjectPackage/eo") as String plistStr=homeDic.appending("/"+"ExportOptions"+".plist") }
So this part all the function code can be realize as:
if isLoadingRepo { showNotice(str: "is running last task", suc: false) return } isLoadingRepo = true
var projectStr=self.projectPath.stringValue if projectStr.first=="/" { }else{ projectStr="/"+projectStr } let nameStr=self.projectName.stringValue var plistStr:String=self.exportOptionsPath.stringValue if plistStr.count<=0 { let homeDic=NSHomeDirectory().appending("/ProjectPackage/eo") as String plistStr=homeDic.appending("/"+"ExportOptions"+".plist") }
var ipaStr=self.ipaPath.stringValue if ipaStr.first=="/" { }else{ ipaStr="/"+ipaStr }
let returnData = Bundle.main.path(forResource: "package", ofType: "sh") let data = NSData.init(contentsOfFile: returnData!) var str = NSString(data:data! as Data, encoding: String.Encoding.utf8.rawValue)! as String if debugRelease.selectedSegment==0 { str = str.replacingOccurrences(of: "DEBUG_RELEASE", with: "debug") }else{ str = str.replacingOccurrences(of: "DEBUG_RELEASE", with: "release") } str = str.replacingOccurrences(of: "NAME_PROJECT", with: nameStr) str = str.replacingOccurrences(of: "PATH_PROJECT", with: projectStr) str = str.replacingOccurrences(of: "PATH_PLIST", with: plistStr) str = str.replacingOccurrences(of: "PATH_IPA", with: ipaStr) str = str.replacingOccurrences(of: "file://", with: "") print("result:\(str)");
DispatchQueue.global(qos: .default).async { let task = Process() // init NSTask // set task task.launchPath = "/bin/bash" // absolute execution path // set command task.arguments = ["-c",str] task.terminationHandler = { proce in // finish block self.isLoadingRepo = false // recover sign //5. back to UI thread DispatchQueue.main.async(execute: { self.logTextField.stringValue="finish running task..."; }) } self.captureStandardOutputAndRouteToTextView(task) task.launch() // run task task.waitUntilExit() // wait to finish }
}
Monitor task output
We all know when we run task in terminal, it will output a lot of log to help us find error. So we need capture some log when we are running our shell script.
If you are carefully, you must find captureStandardOutputAndRouteToTextView(task) before in *start(_ sender: Any) * method. So now we realize this function:
extension ViewController{ fileprivate func captureStandardOutputAndRouteToTextView(_ task:Process) { //1. set output standard pipe outputPipe = Pipe() task.standardOutput = outputPipe
//2. waiting for notification outputPipe.fileHandleForReading.waitForDataInBackgroundAndNotify()
//3. receive notification
observe=NotificationCenter.default.addObserver(forName: NSNotification.Name.NSFileHandleDataAvailable, object: outputPipe.fileHandleForReading , queue: nil) { notification in
//4. get pipe data, transform to string let output = self.outputPipe.fileHandleForReading.availableData let outputString = String(data: output, encoding: String.Encoding.utf8) ?? "" if outputString != ""{ //5. goto main UI DispatchQueue.main.async {
if self.isLoadingRepo == false { let previousOutput = self.showInfoTextView.string let nextOutput = previousOutput + "\n" + outputString self.showInfoTextView.string = nextOutput // scroll to bottom let range = NSRange(location:nextOutput.utf8CString.count,length:0) self.showInfoTextView.scrollRangeToVisible(range)
if self.observe==nil { return } NotificationCenter.default.removeObserver(self.observe!)
return }else{ let previousOutput = self.showInfoTextView.string var nextOutput = previousOutput + "\n" + outputString as String if nextOutput.count>5000 { nextOutput=String(nextOutput.suffix(1000)); } // scroll to bottom let range = NSRange(location:nextOutput.utf8CString.count,length:0) self.showInfoTextView.scrollRangeToVisible(range) self.showInfoTextView.string = nextOutput } } }
if self.isLoadingRepo == false { return } //6. waiting for next notification self.outputPipe.fileHandleForReading.waitForDataInBackgroundAndNotify() } }
Once we create a task, we need to save it to local, so that we can recover when reopen the app.
Create store documents when launch
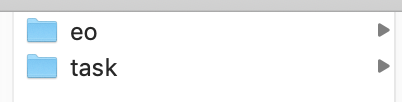
When we use the app in first time, i will create two documents to store data when in use. The /ProjectPackage/eo is used to save ExportOptions.plist file and the /ProjectPackage/task is used to save tasks we will create when in use.
let taskPath=NSHomeDirectory().appending("/ProjectPackage/task") as String let eoPath=NSHomeDirectory().appending("/ProjectPackage/eo") as String
let fileM=FileManager.default let existed:Bool=fileM.fileExists(atPath: taskPath, isDirectory: nil) if (existed==false) { do { try fileM.createDirectory(at: NSURL.fileURL(withPath: taskPath), withIntermediateDirectories: true, attributes: nil) }catch{
} } let existed_eo:Bool=fileM.fileExists(atPath: eoPath, isDirectory: nil) if (existed_eo==false) { do { try fileM.createDirectory(at: NSURL.fileURL(withPath: eoPath), withIntermediateDirectories: true, attributes: nil) }catch{
} } // print(read() as Any)
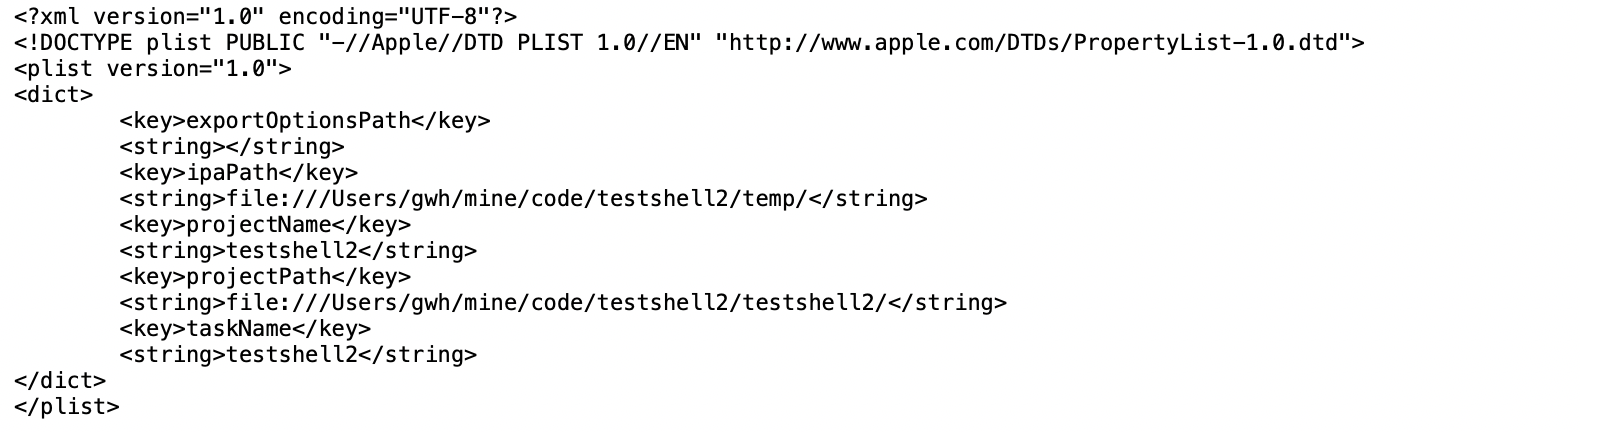
//save exp let returnData = Bundle.main.path(forResource: "ExportOptions", ofType: "plist") let data = NSData.init(contentsOfFile: returnData!) var str = NSString(data:data! as Data, encoding: String.Encoding.utf8.rawValue)! as String let homeDic=NSHomeDirectory().appending("/ProjectPackage/eo") as String let fileName:String=homeDic.appending("/"+"ExportOptions"+".plist") data!.write(toFile: fileName, atomically: true)
Save task
When we add a new task, we don’t want to configure it again. So we save it as template.
1 2 3 4 5 6 7 8 9 10 11 12 13 14
func saveCurrentTable(){ let saveDic=readFromCurrentTable(); let taskS=saveDic.object(forKey: "taskName") as! String if taskS.count<=0 { showNotice(str: "give a taskName please", suc: false) return; } showNotice(str: "create【"+taskS+"】success", suc: true)
let homeDic=NSHomeDirectory().appending("/ProjectPackage/task") as String let fileName:String=homeDic.appending("/"+taskS+".plist")
func read() ->[NSDictionary]? {
        let homeDic=NSHomeDirectory().appending("/ProjectPackage/task") as String
        print(homeDic)

        var taskList:[NSDictionary]=[]

        let fileM=FileManager.default
        do {
            let cintents1 = try fileM.contentsOfDirectory(atPath: homeDic)
//            print("cintents:\(cintents1.count)\n")

            for name in cintents1 {
                let fileName:String=homeDic.appending("/"+name)
                let taskDic=readFileName(fileName: fileName)
                if (taskDic) != nil{
                    taskList.insert(taskDic!, at: 0)
                }
            }
        } catch {

        }
        return taskList
    }
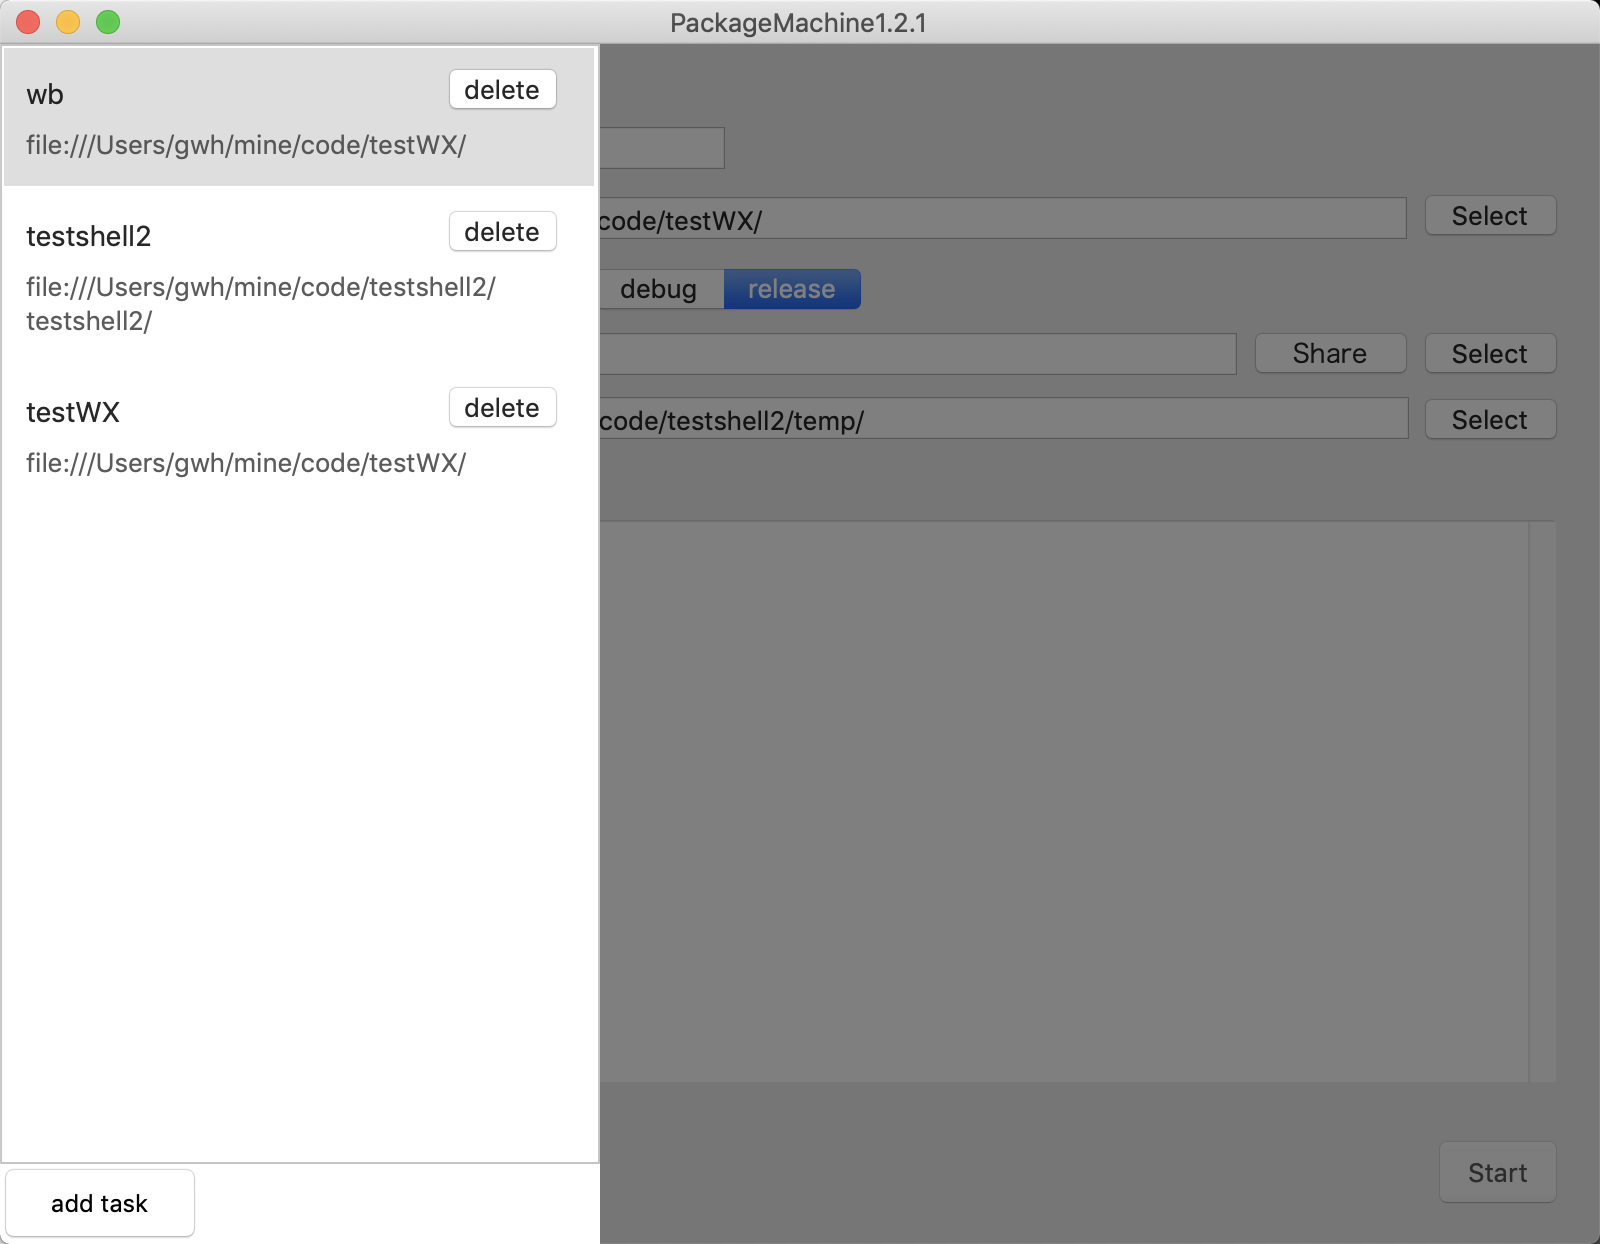
Task board
Task board is used to manage many different tasks. So we add a tableview in task board to display and let user select a task they want to use.
If you are an iOS developer, you must know how to create tableview. In macOS, it be named as NSTableView. And we will add a NSTableView to NSView.
let colorBoard:NSView=NSView.init() colorBoard.frame=board.visibleRect colorBoard.wantsLayer=true colorBoard.layer?.backgroundColor=NSColor.black.cgColor colorBoard.alphaValue=0.5; board.addSubview(colorBoard)
let cancelBt:NSButton=NSButton.init() cancelBt.frame=board.visibleRect cancelBt.alphaValue=0; cancelBt.action = #selector(cancelBtTapped(bt:)) board.addSubview(cancelBt)
let leftBoard:NSView=NSView.init() leftBoard.frame=NSRect(x:0,y:0,width:300,height:board.visibleRect.height) leftBoard.wantsLayer=true leftBoard.layer?.backgroundColor=NSColor.white.cgColor board.addSubview(leftBoard)
dataSource = read()
scrollView.frame=NSRect(x:leftBoard.frame.origin.x,y:leftBoard.frame.origin.y+40,width:leftBoard.frame.size.width,height:leftBoard.frame.size.height-40) // tableView.delegate=(self as NSTableViewDelegate) // tableView.dataSource=(self as NSTableViewDataSource) board.addSubview(scrollView)
let addBt:NSButton=NSButton.init() addBt.frame=NSRect(x:0,y:0,width:100,height:40) let str="add task" as String let attrTitle = NSMutableAttributedString.init(string: str) let titleRange = NSMakeRange(0, str.count) attrTitle.addAttributes([NSAttributedString.Key.foregroundColor: NSColor.black], range: titleRange)
if tableView.tableColumns.count>0 { let tc = tableView.tableColumns[0] let gap: CGFloat = 10 //width outside of label cell.titleLabel.preferredMaxLayoutWidth = tc.width - gap cell.detailLabel.preferredMaxLayoutWidth = tc.width - gap }
@IBAction func courseTapped(_ sender: Any) {
        let returnData = Bundle.main.path(forResource: "README", ofType: "md")
        let data = NSData.init(contentsOfFile: returnData!)
        let str =  NSString(data:data! as Data, encoding: String.Encoding.utf8.rawValue)! as String
        self.showInfoTextView.string=str
}
Tips
Remember do not open App Sandbox in capabilities. If you do so, you cannot get local path to execute shell script. But if you want to let your app pass AppStore, you should open it.
The first time open .dmg you will get a warning that you cannot open an app from un-know developer. So you should goto security and safety to grant authorization.
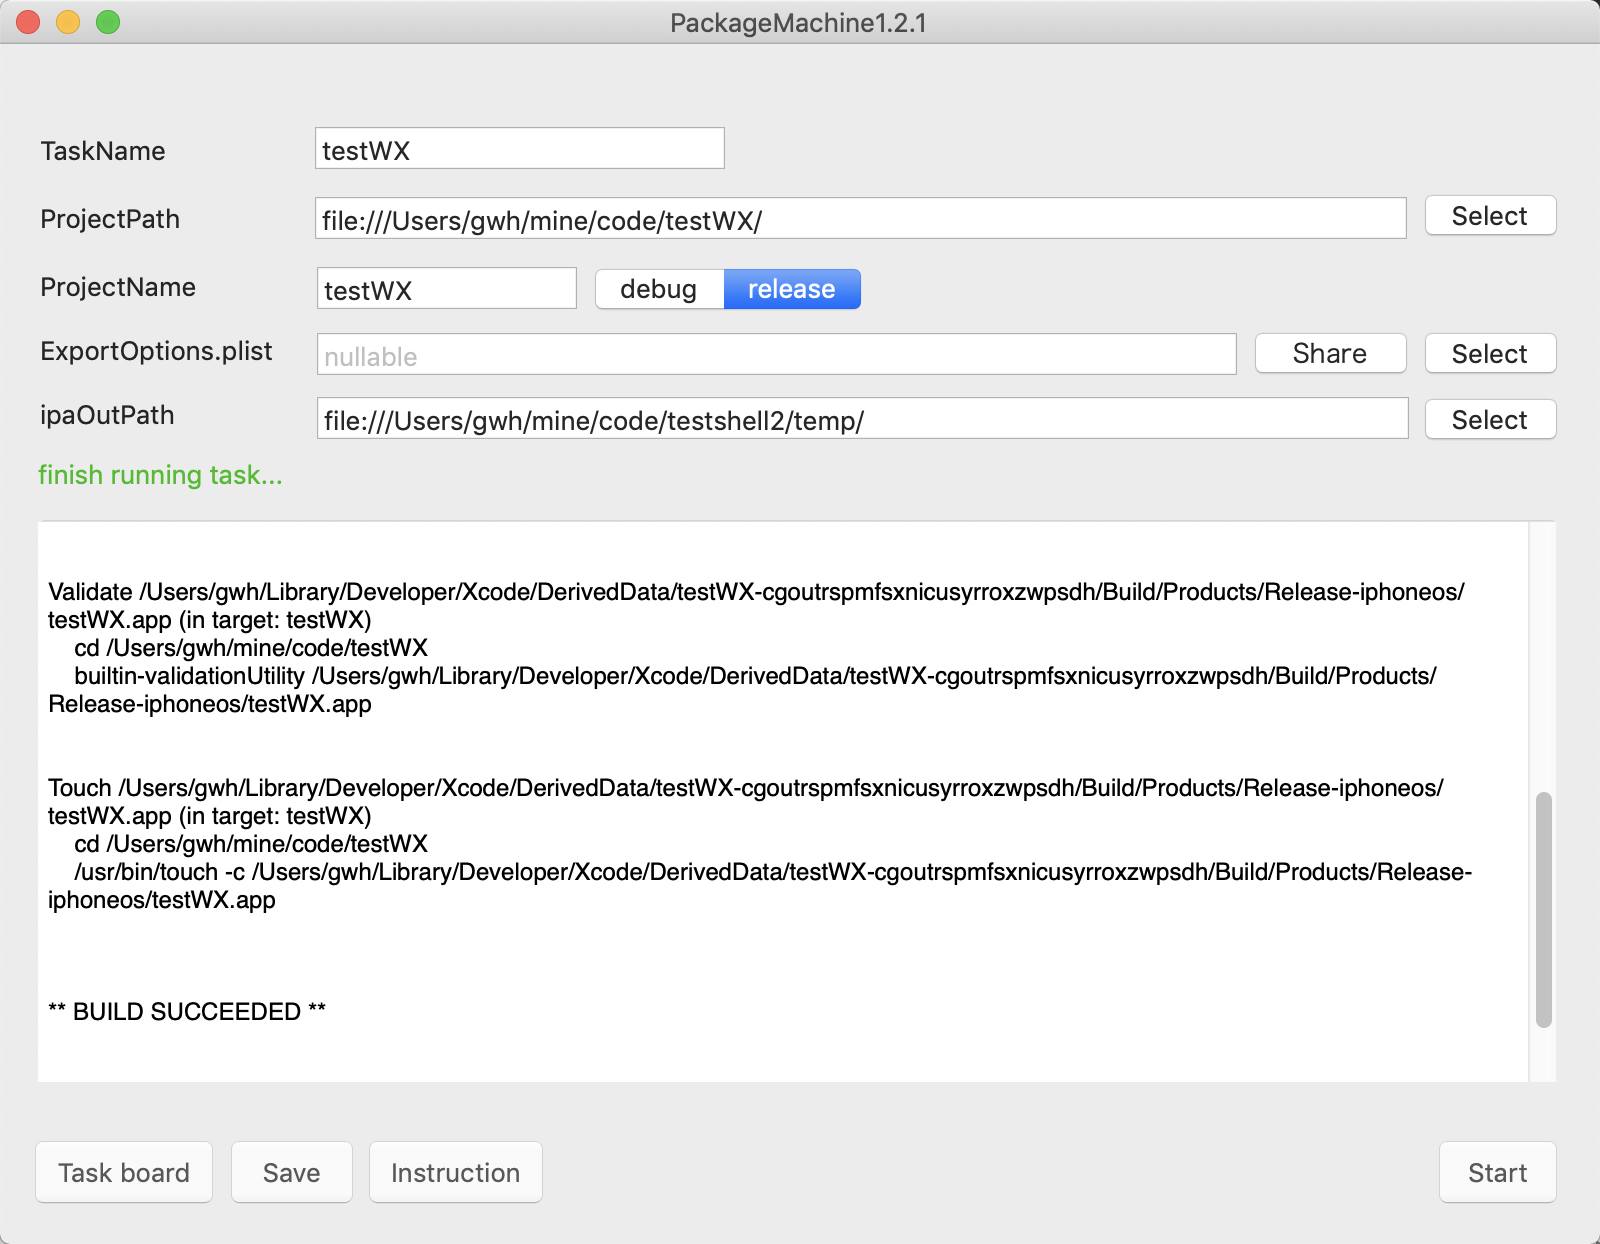
Demonstration
When finish set template, we click start:
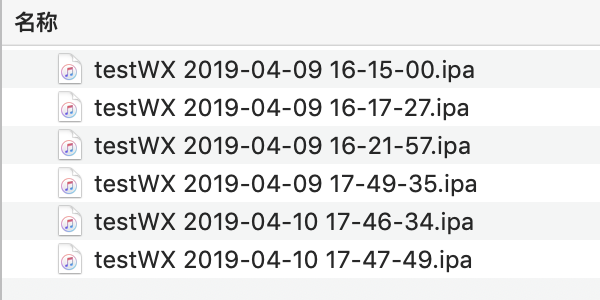
Then we get .ipa file. Also I append date to file name to tell different package file, otherwise it will overlap old file.